The premiere source of truth powering network automation. Open and extensible, trusted by thousands.
NetBox is now available as a managed cloud solution! Stop worrying about your tooling and get back to building networks.
Live Packet Capture in Wireshark With GNS3
By stretch | Wednesday, April 6, 2011 at 1:13 a.m. UTC
Dynagen and its complementary GUI GNS3 provide the very handy ability to capture traffic sent between emulated devices. Packets are written to a capture file on disk, which can then be opened with a packet analyzer like Wireshark. The only downside to this is that the traffic does not appear live in the analysis application; the capture buffer is populated only with the pakcets which have been recorded up to that point.
In Wireshark, the contents of a capture file can be refreshed by pressing Ctrl+R, but this requires tedious manual intervention and navigating to the end of the buffer every time. After taking a clue from the Wireshark wiki I was able to modify the way in which Wireshark reads capture files generated by Dynagen/GNS3 and achieve a near-real-time view of the traffic, as if it was being sniffed from a physical interface. My solution should work on all UNIX-like systems (e.g. Linux), but Windows users will have to look elsewhere.
The trick is to continuously dump the capture file being written by Dynagen to standard output, which can be fed to Wireshark as standard input. Open the preferences dialog in GNS3 (Edit > Preferences...) and select capture preferences. Modify the default Wireshark command from /usr/bin/wireshark %c to read as follows. (Thanks to e36freak in #bash on Freenode for assistance manipulating the shell command to work in GNS3!)
tail --bytes=+0 -f %c | wireshark -k -i -

Also, check the option to automatically start the command when capturing.
Here's how the command works: The tail executable with the -f argument constantly outputs the content of the capture file as it is written. The --bytes=+0 bit instructs tail to begin from the first byte of the file. (This part is optional, but recommended to avoid "unknown libpcap format" errors in Wireshark.) The output of tail is piped to Wireshark. Wireshark's arguments instruct it to begin capturing immediately from standard input.
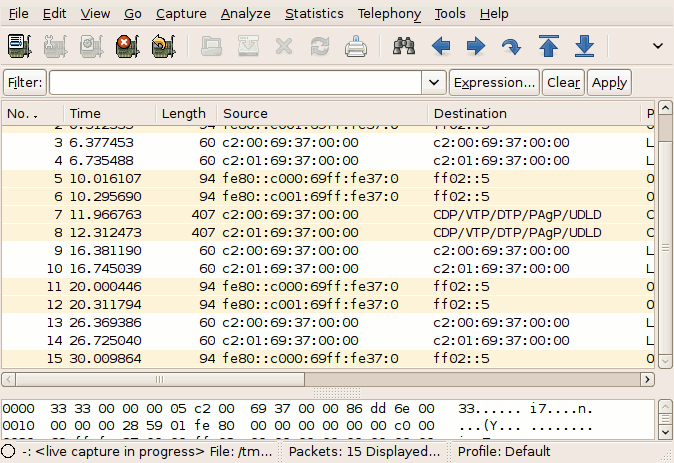
Now, Wireshark should start immediately after selecting a capture interface and its capture buffer should be updated nearly in real-time. Tail introduces a ~1-second delay, which can be tweaked with the -s argument if desired.
You might receive an error indicating that the capture file "is empty, no traffic captured on the link." This simply means that no packets were captured in the time between initiating the capture and starting Wireshark. Right-clicking on the interface in GNS3 again and selecting "Start Wireshark" a moment later should resolve it (assuming there is traffic flowing across the interface being captured).
The solution described here will also work using Dynagen alone: Simply execute the command above by hand, substituting %c with the appropriate file name.
Posted in Tips and Tricks
Comments
April 6, 2011 at 8:33 a.m. UTC
Nice article, I used to have the same problem in Windows which I wanted to capture packets on Wireshark from Dynagen in Windows.
Well, I don't know whether is there a better solution, here's how I did it:
Create 2 loopback adapters in Windows.
Then map the router interfaces in the network file to the loopback adapter:
R1 E0/0 -> Windows Loopback Adapter1
R2 E0/0 -> Windows Loopback Adapter2
We can then bridge the 2 loopback adapters in Windows and startup Wireshark to monitor these "real" interfaces while we generate traffic in Dynagen.
Hope this fill in the blanks for Windows users and they might not have to look elsewhere!
April 6, 2011 at 12:49 p.m. UTC
Well, technically it is Dynamips that creates the PCAP files (this part of code was written by Greg Anuzelli, who also wrote Dynagen).
April 6, 2011 at 1:52 p.m. UTC
Great idea!
April 6, 2011 at 6:41 p.m. UTC
Just install the tail for windows and follow the howto =)
April 9, 2011 at 12:23 p.m. UTC
Hello,
on linux, i use to attach links i want to sniff on in a tap device:
(as root) tunctl -u YourUsername
this creates a tapX device you can use.
Than attach that in the cloud and.. just sniff locally.
See ya ;)
April 13, 2011 at 4:19 a.m. UTC
Add star sarath kumar sarath296@gmail.com Wed, Apr 13, 2011 at 9:41 AM To: no-reply@packetlife.net Reply | Reply to all | Forward | Print | Delete | Show original please send procedure for token bus,token ring ,packet transmission,link state algorithm,distance vector routing algorithm,goback N ARQ,selecitve rejectarq
April 23, 2011 at 11:35 p.m. UTC
This worked great with Ubuntu Desktop 10.10, GNS3 0.7.3 and Wireshark 1.2.11. Thanks for another great article. jeff
May 17, 2011 at 6:35 a.m. UTC
I am trying to do the same under windows, what I know now is that if I press CRTL+R I refresh the packet capture, but still not "real time capture".
Kind regards
May 19, 2011 at 4:34 p.m. UTC
hello All, recently my colleague told me that he tried SPAN or RSPAN for live Wireshark captures in GNS, he connected a router with switch module and directed traffic to loopback on his physical machine (his laptop) and got live captures, what do you think about it ?
June 13, 2012 at 5:28 a.m. UTC
Hi,
FYI, newer versions of GNS3 now support live traffic capture with Wireshark.
September 19, 2012 at 8:40 p.m. UTC
Jeremy, its awesome. Thats why I love linux!
February 2, 2013 at 10:45 a.m. UTC
thanks for the article. works like a charm
August 22, 2013 at 9:41 a.m. UTC
Thanks man . it worked perfectly.
November 26, 2013 at 3:01 a.m. UTC
Thank you very much!